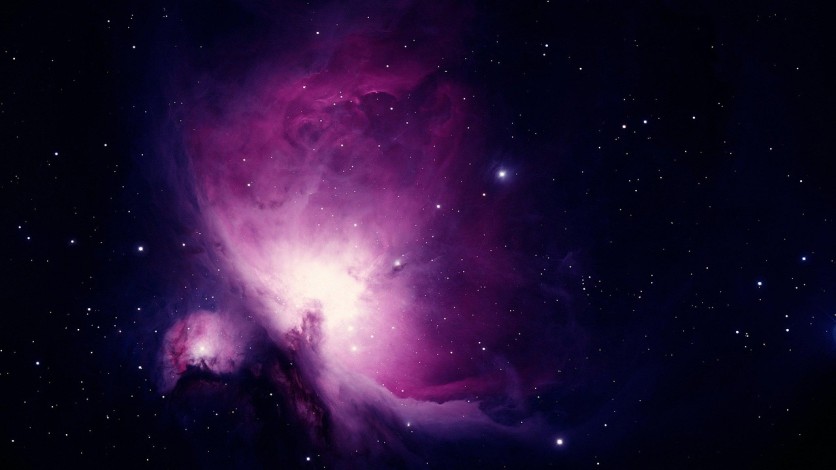
Beginner astrophotography has become far more accessible, with modern cameras and entry-level astrophotography gear making it realistic to capture the moon, bright planets, and even some nebulae.
Astrophotography focuses on photographing objects in the night sky under very low light, which means long exposures, careful focusing, and dealing with the constant motion of the stars. For beginners, the most practical path is to start with bright, easy targets and build skills gradually.
What Is Astrophotography and How Do Beginners Get Started?
Astrophotography can be divided into three broad categories: lunar and planetary imaging, wide‑field shots of the Milky Way and star fields, and deep‑sky images of galaxies and nebulae.
The main challenges are low light, camera shake, star trailing, and digital noise, but these can be managed with basic technique rather than expensive equipment. For a first project, the moon is ideal because it is bright, easy to frame, and forgiving of minor mistakes.
Most people can begin beginner astrophotography with gear they already own. A DSLR or mirrorless camera with manual exposure and manual focus, plus a sturdy tripod, is enough to photograph the moon and some bright deep‑sky objects.
A modern smartphone with a manual or "Pro" mode can also work for simple moon images. The essential step is learning to control shutter speed, aperture, ISO, and focus instead of relying on automatic modes.
Essential Entry‑Level Astrophotography Gear
Entry-level astrophotography gear centers on three items: a camera with manual controls, a solid tripod, and at least one suitable lens. DSLRs and mirrorless cameras are preferred for their low‑light performance and ability to use different lenses.
A stable tripod is crucial because even slight movement during a long exposure can blur stars and smear detail on the moon or planets.
Lens choice depends on the target. For the moon and planets, a telephoto or zoom lens in the 200–300 mm range or longer helps reveal craters and planetary discs.
For nebulae and the Milky Way, wide‑angle or short telephoto lenses with relatively wide maximum apertures (such as f/2.8 or f/3.5) are more useful, since they collect more light in a given exposure.
A small star tracker or basic equatorial mount is a valuable future upgrade, allowing longer exposures without star trails, which is particularly helpful for faint nebulae, but it is not essential on day one.
Simple accessories add reliability and convenience: a remote shutter release or timer, spare batteries, and phone apps for checking moon phases, planetary positions, and visibility of key nebulae. With just these basics, beginners can conduct meaningful astrophotography sessions rather than casual snapshots.
Planning an Astrophotography Session
Planning is as important as gear. Light pollution strongly affects deep‑sky and nebulae astrophotography, so darker locations away from city lights reveal more detail and contrast. Even in towns, choosing spots shielded from direct lighting and with a clear southern or eastern horizon can help.
Timing depends on the subject. The moon often looks best when it is not full; during crescent, quarter, or gibbous phases, the terminator line creates dramatic shadows that emphasize surface detail.
Planet visibility changes through the year, so planetarium apps are useful for checking when Jupiter, Saturn, or Mars are high in the sky. Nebulae are typically seasonal and are best photographed on clear, dry nights when the moon is below the horizon or very slim, to avoid washing out faint nebulosity.
How to Photograph the Moon
The moon is the classic entry point into beginner astrophotography. With a camera on a tripod and a telephoto lens, the photographer switches to manual mode, uses a relatively low ISO (around 100–400), a mid‑range aperture (about f/8 to f/11), and a shutter speed fast enough to keep the image sharp while preserving detail. These settings are then fine‑tuned after reviewing test shots.
Focusing is best done manually. Using live view and zooming in on the moon allows precise adjustment until crater edges are crisp. A short self‑timer or remote release helps avoid camera shake from pressing the shutter.
Smartphone users follow the same principles: stabilize the phone, use any available manual controls for exposure, and tap‑to‑focus carefully on the lunar disc. While phones lack the reach and clarity of long lenses, they can still produce effective moon images with minimal additional cost.
Read more: Ultrahigh Energy Cosmic Rays May Be Heavier Than Iron: Penn State Study Points to New Sources
How to Photograph Planets
Planets are smaller and more demanding targets but can still be captured with entry-level astrophotography gear.
With a telephoto lens or small telescope, planets like Jupiter and Saturn appear as small discs rather than points of light. The aim is to balance magnification with sharpness; too much power exaggerates vibration and atmospheric distortion.
Many planetary photographers record short video clips rather than single still images. By capturing hundreds or thousands of frames and then stacking the best ones in software, they reduce noise and increase visible detail.
This approach uses short exposures and moderate ISO levels to keep the planet bright but not overexposed. Adapters that hold a camera or smartphone at the telescope eyepiece can give beginners an affordable way to record planetary views without buying a dedicated astronomy camera.
How to Photograph Nebulae With Entry‑Level Gear
Nebulae are among the most striking targets in astrophotography but are also much fainter than the moon or planets. With a camera on a tripod and no tracker, beginners start with bright, large nebulae and use wide‑angle or short telephoto lenses at their widest practical aperture.
Higher ISO values are often necessary to record faint light in relatively short exposures before stars begin to trail.
Because long, single exposures are limited, many photographers capture multiple shorter frames and stack them using free software. Stacking averages out noise and reveals faint details not obvious in individual shots.
Adding a small star tracker allows significantly longer exposures at lower ISO, making nebulae structures clearer and more colorful. Accurate manual focus on a bright star and careful polar alignment of the tracker become critical steps as exposure times lengthen.
Growing Skills With Beginner Astrophotography
Beginner astrophotography is most rewarding when it is approached as a gradual learning process rather than a race to acquire expensive equipment.
Starting with the moon builds confidence in exposure and focus, moving on to planets introduces techniques like video capture and stacking, and tackling nebulae develops skills in planning, tracking, and post‑processing.
Along the way, thoughtful upgrades in entry-level astrophotography gear, such as a better tripod, a faster lens, or a basic tracker, offer meaningful improvements without overwhelming complexity.
By consistently practicing, reviewing results, and adjusting technique, newcomers can steadily improve their images of the moon, planets, and nebulae. In time, what began as simple curiosity about night photography evolves into a capable, rewarding practice of astrophotography that continues to deepen with each clear night under the stars.
Frequently Asked Questions
1. Can I do astrophotography from a light‑polluted city?
Yes, it is possible, but results are better on bright targets like the moon and planets; faint nebulae usually require darker skies or filters to show good detail.
2. How important is weather for beginner astrophotography?
Very important, clear, dry nights with minimal haze or clouds give sharper stars and better contrast, especially when photographing dim nebulae.
3. Do I need to learn advanced editing software to start astrophotography?
No, beginners can start with simple adjustments like cropping, brightness, contrast, and noise reduction in basic photo apps before moving on to stacking and advanced tools.
4. How long does it take to see improvement in my astrophotography images?
Most beginners notice clear progress after a few dedicated sessions as they refine focus, exposure, and planning, even when using the same entry‑level gear.
ⓒ 2026 TECHTIMES.com All rights reserved. Do not reproduce without permission.


